
This beautiful, colourful window has an interesting tale to tell. It was unloved and destined for the skip of someone who was renovating their home until my clients bought and rescued it. True, it had a cracked panel in a noticeable area in the centre of the design and it was too small for the area where they wanted to display it, but they could see its potential.
They brought the panel to me and explained that their plan was to use it to block an unsightly view from their landing window. The existing window was a double glazed sealed unit which they did not want to disturb, so we agreed that the stained glass window would be secured independently in the recess.
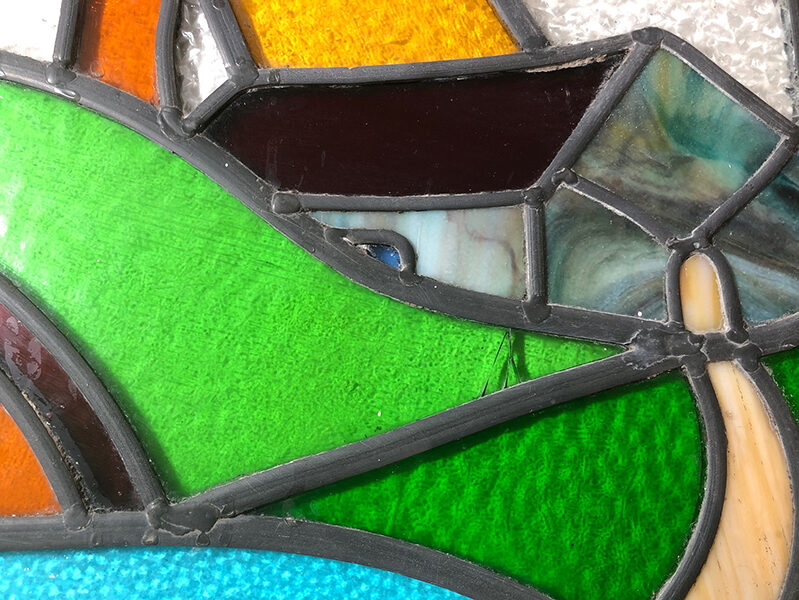
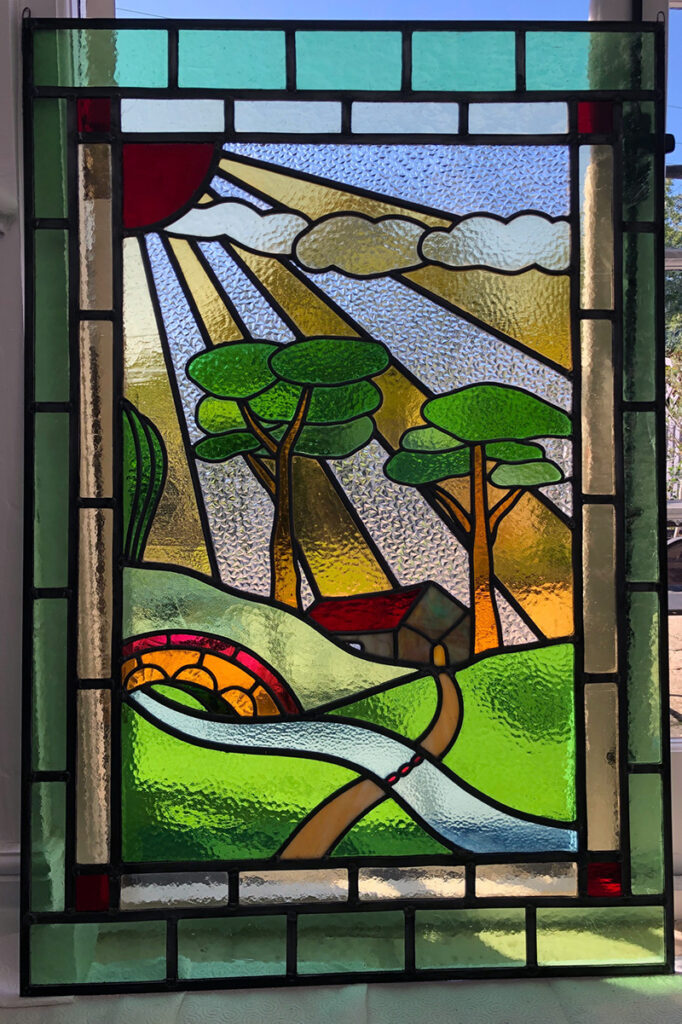
I checked the stained glass window over for damage and luckily, apart from the previously mentioned broken piece, it was sound and just rather dirty. It was also too small to block the view in its existing state. We decided that the best solution was to add a double border around the outside in pale, complementary colours, but with pops of red in the corners in the form of squares. As this would make it both large and heavy, I suggested that it would need steel strengthening strips added within the leads, as well as zinc came as a frame around the whole design. This was particularly important as the panel would be free-standing and not supported with the usual window frame set-up at the sides.
I drew up a computer sketch of how the new design would look and, once approved, began work on removing and replacing the broken piece of glass in the centre. I also took the opportunity to add a steel strip within the existing lead here.
Next, the left and bottom areas of the new border were constructed, before the panel was introduced. Then the rest of the border was added and the joints were spot-soldered. At this stage, every window is a bit wobbly as the leads have not been filled with cement. But it has to be turned over carefully so that the reverse side can be soldered. This panel took two of us to turn it over but the manoeuvre went well.
After soldering, the repaired area and new surround were filled with lead light cement (which looks like black tar), dried with whiting and then cleaned up. This slow and messy process had to be repeated on the other side, but at each stage it was becoming stronger and less rattly.
Once the panel had had a general clean, the new leads had to be blacked to tone them in with the leads of the original stained glass window. This was another messy endeavour and necessitated further careful cleaning of both sides.
My final quality control stage was to stand the window in daylight to remove any last residues of cement and blacking. I also scratched off old paint and debris that had accumulated on the central design over the years. Despite all this hard labour, it was a joy to see the rich colours come alive in the sunlight.
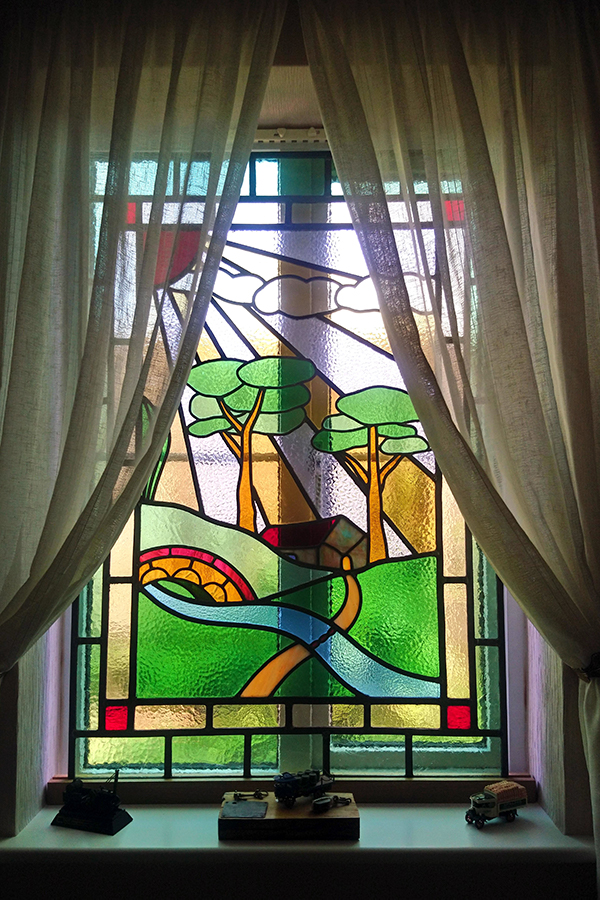
On a practical level, the clients had requested metal loops to be added on the top of the panel that would be used to tether it at the top. At the bottom, they planned to use a piece of wood that they had had custom-cut to the width of the existing window sill and with a wide slot in the top that would support the base of the stained glass panel.
The clients were very pleased when I sent them a photo of their finished stained glass window, saying, “Wow!!! That does look fantastic – thank you so much!”
They subsequently installed it successfully and sent me this photo. It is always great to see pieces in their final location. The client commented, “It’s such a lovely piece and makes us smile! No more unlovely view from the landing.”
You never know what the next client will want, but that is part of the fun of having the job of a stained glass artist. It is great to collaborate to create something that they love.


0 Comments