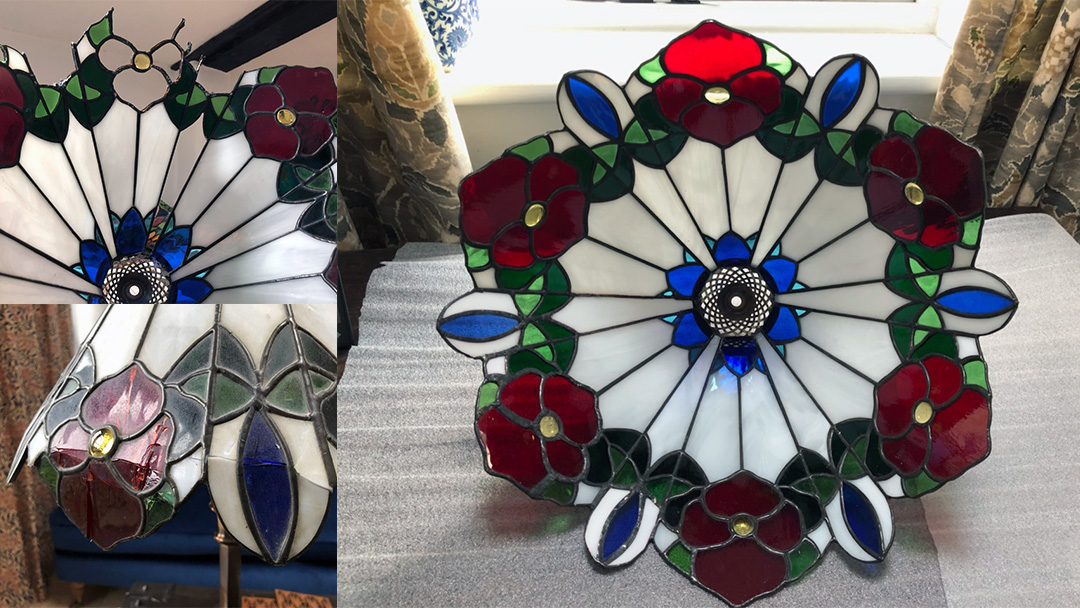
This poor, flat-sided Tiffany lamp was badly cracked along two sides. One of the long, white pieces was damaged and needed replacing. There was also a crack in one of the red flower petals, on the opposite side to the main area of damage.
An important part of a Tiffany lamp repair project is selecting the right stained glass colours to match the existing lamp colours.
The first area to tackle was the long, white piece of stained glass. The shards were removed carefully and a fresh piece was cut and fitted.
Then I moved on to the damaged edge pieces. I scored the broken glass to make it easier to remove when it was tapped. It is easy to cause further damage to the surrounding glass when knocking out the cracked areas, so this had to be done gently.
At each stage, a new piece of stained glass was measured to fit each space, then cut and ground. Copper foil was applied and then the glass was positioned and soldered into place. The new joints were bead soldered to blend in with the existing lamp and provide a neat finish. They were blacked and then the whole shade was cleaned inside and out.
I have done a lot of Tiffany lamp repair jobs over the years and each one has its own challenges. A slow and careful approach is always necessary. In the end, the patience pays off with a revived Tiffany lamp that can be used and enjoyed again.
If you have a damaged Tiffany lamp that you would like repaired so you can enjoy it again, please get in touch and send me some photos of the problem areas. I’ll do my best to help you.




0 Comments